RIBO launched IRIS, a new broker management system in February 2024, as part of our ongoing efforts to modernize our systems and enhance the services we provide our licensees.
Getting set up is as easy as 1-2-3:
For additional tutorial videos, step-by-step instructions and frequently asked questions, please see our Launch Guide and our Introduction to IRIS webpage.
Step 1: Email Invitation
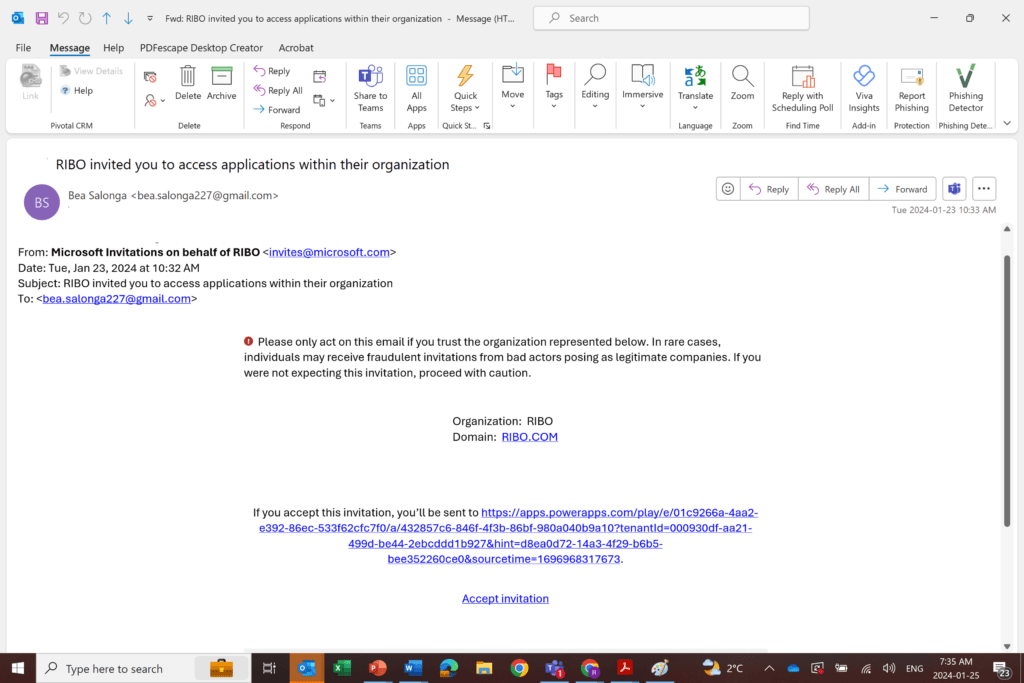
You should have received an email invitation that looks like the one shown below. This invitation allows you to gain access to IRIS.
Click the Accept Invitation link in that email.
You will be asked what email you are using for IRIS. Type the email address the invitation was sent to.
You will receive a code. Enter this code and accept the terms. You will then be directed to IRIS.
Don’t have an invitation? Please use the Resend My Invite web form.
Note: When you reset your password or have a code sent to you, it is handled by your email provider and not RIBO.
Once you have your email invitation, watch the 2-minute instructional video on how to proceed.
Step 2: Access
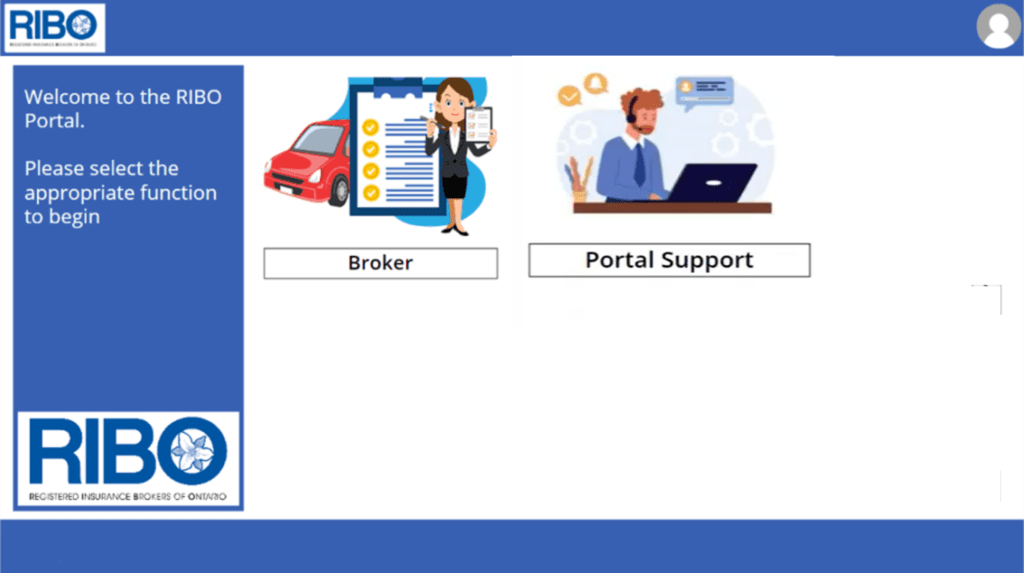
After you have completed Step 1, you will be taken to the portal home page, as shown below.
To access your profile, click on the Broker tile.
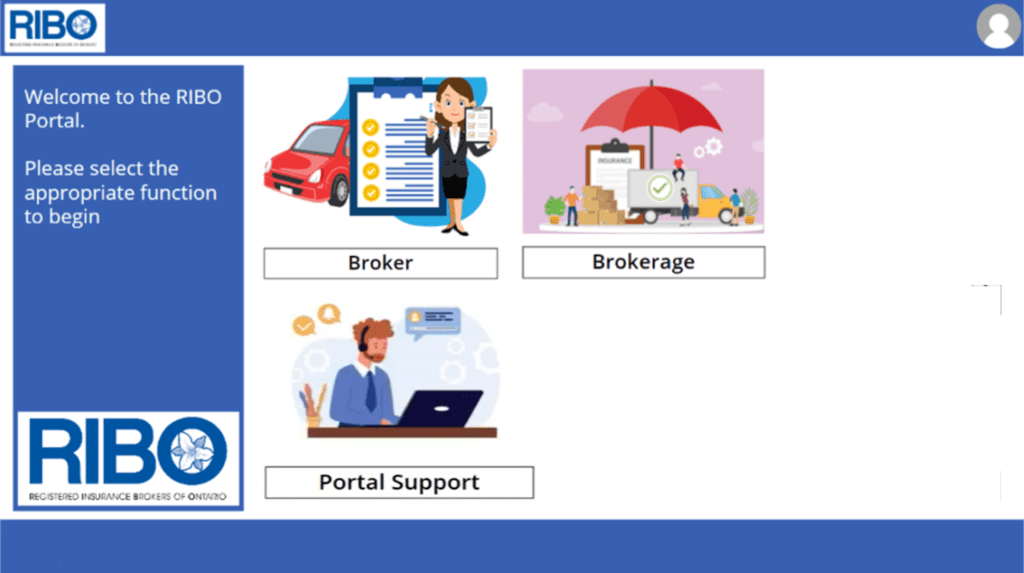
If you are a Principal Broker, your portal home page will also have a Brokerage tile.
Step 3: Validation
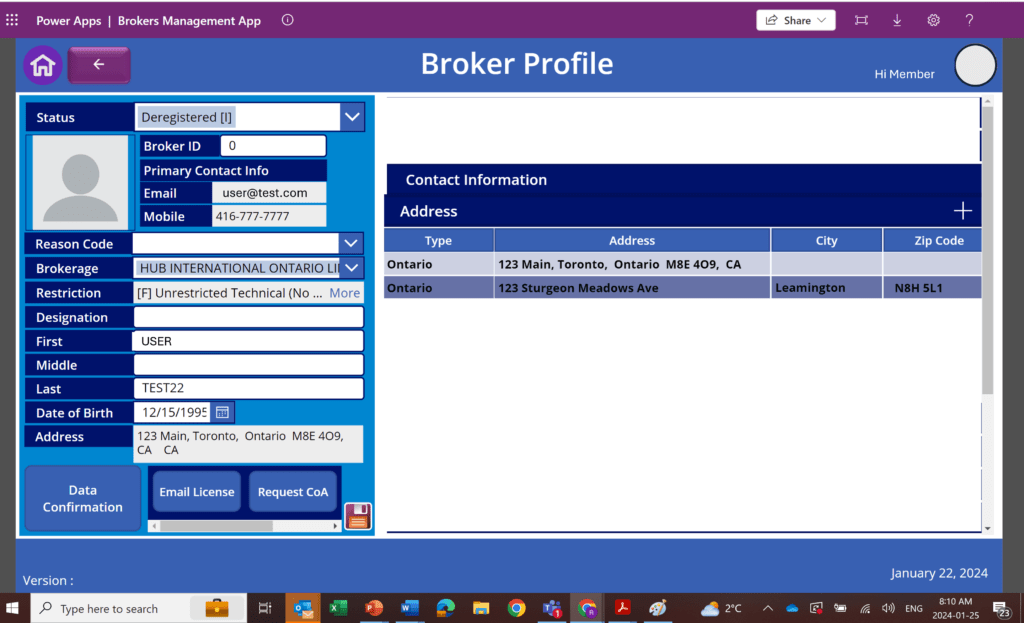
Check the information we have on record for your profile to ensure it is correct. (Your profile screen will look similar to what is shown below.)
For the first phase of IRIS, you will see the following information displayed:
- Contact
- Phone
- Address
- License Info
- License number and status
- Restrictions
- Current brokerage
How to Verify Your Information
There are two ways you can verify your information. You only need to do one.
- Click on the Contact Information tab and the Address tab to verify what is on record, or
- Click the Data Confirmation button at the bottom left. This will take you to a screen that presents all the information in one place.
Need to Correct Your Information?
If corrections are needed for your address or phone number, you can make them on the Broker Profile screen. Remember to click the Save icon (that looks like a floppy disk) to ensure your changes are recorded.
To change your email address, please email support@ribo.com. We will make that update for you, as it cannot be done by you.
How to Email Yourself a Copy of Your License
From your Broker Profile screen, click on the Email License button.
The conditions that must be met to do this are shown whenever you hover over that button.
Are You a Principal Broker?
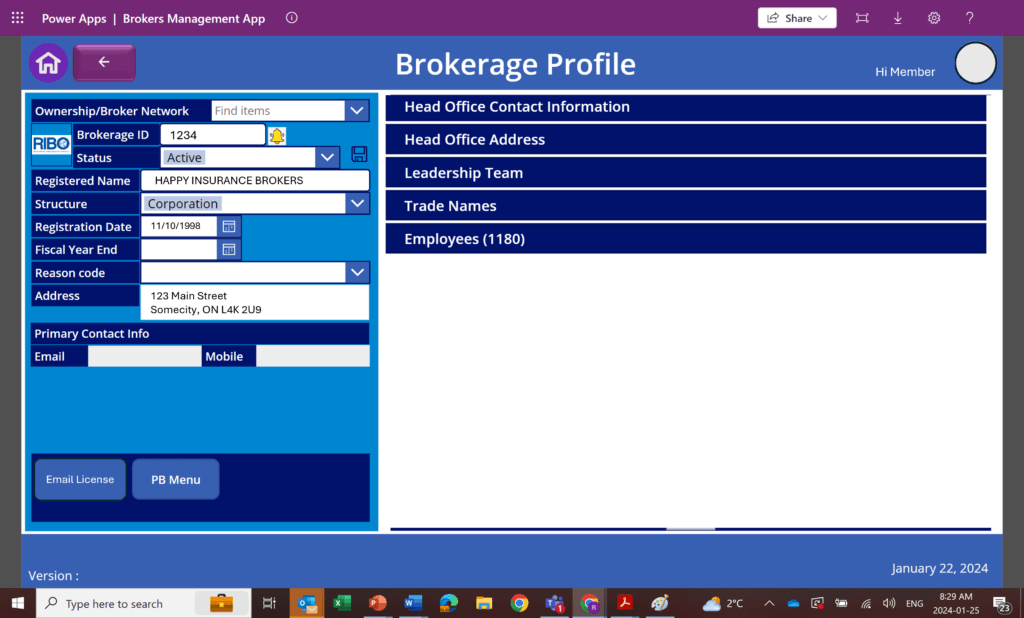
When Principal Brokers log into their portal, they will see a Brokerage tile, as shown below.
In addition to the Contact, License and Address details discussed above, the Brokerage profile also includes your Employee List and the ability to send yourself a copy of that list.
As a Principal Broker, you can also send a copy of the Brokerage License to yourself (see instructions below), in the same manner that a broker can send themselves a copy of their license.
The Brokerage Profile looks like this:
How to Email Yourself a Copy of Your License
From your Broker Profile screen, click on the Email License button at the bottom left to send a copy of your license to yourself.
The conditions that must be met to do this are shown whenever you hover over that button.
You will need to have checkboxes next to your Primary Contact (in the Contact Tab) and a Current Home Address (Address Tab).
Have Feedback?
Please send your feedback on IRIS via our IRIS Feedback web form.
Still Need Help?
RIBO is committed to helping you access IRIS.
Before contacting us, please carefully read all of the above and consult the resources near the top of the page, which may answer your question.
If you require further help, email support@ribo.com, and our team will be happy to assist you.
